 Pay4SaaS
5 Post-Launch SEO Essentials
01
Time to set up SEO. What is it exactly?
SEO helps search engines (Google, Bing, etc.) understand your website and rank your pages higher in search results.
Higher rankings mean more visibility, more traffic, more sign-ups, and ultimately more revenue.
So what SEO tasks should you complete after launch?
02
1. Connect with Google Search Console
Tell Google "this is my site" by officially verifying ownership.
Go to: Google Search Console
Choose URL prefix, since you likely have a single domain.
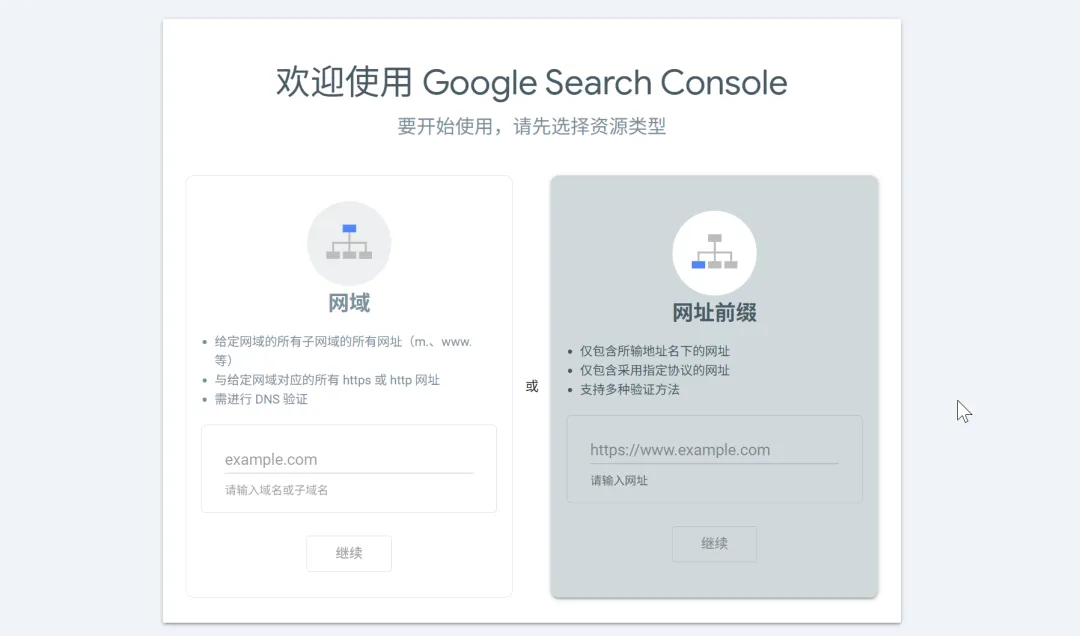
For verification, use the HTML tag method — it's the simplest. Click copy.
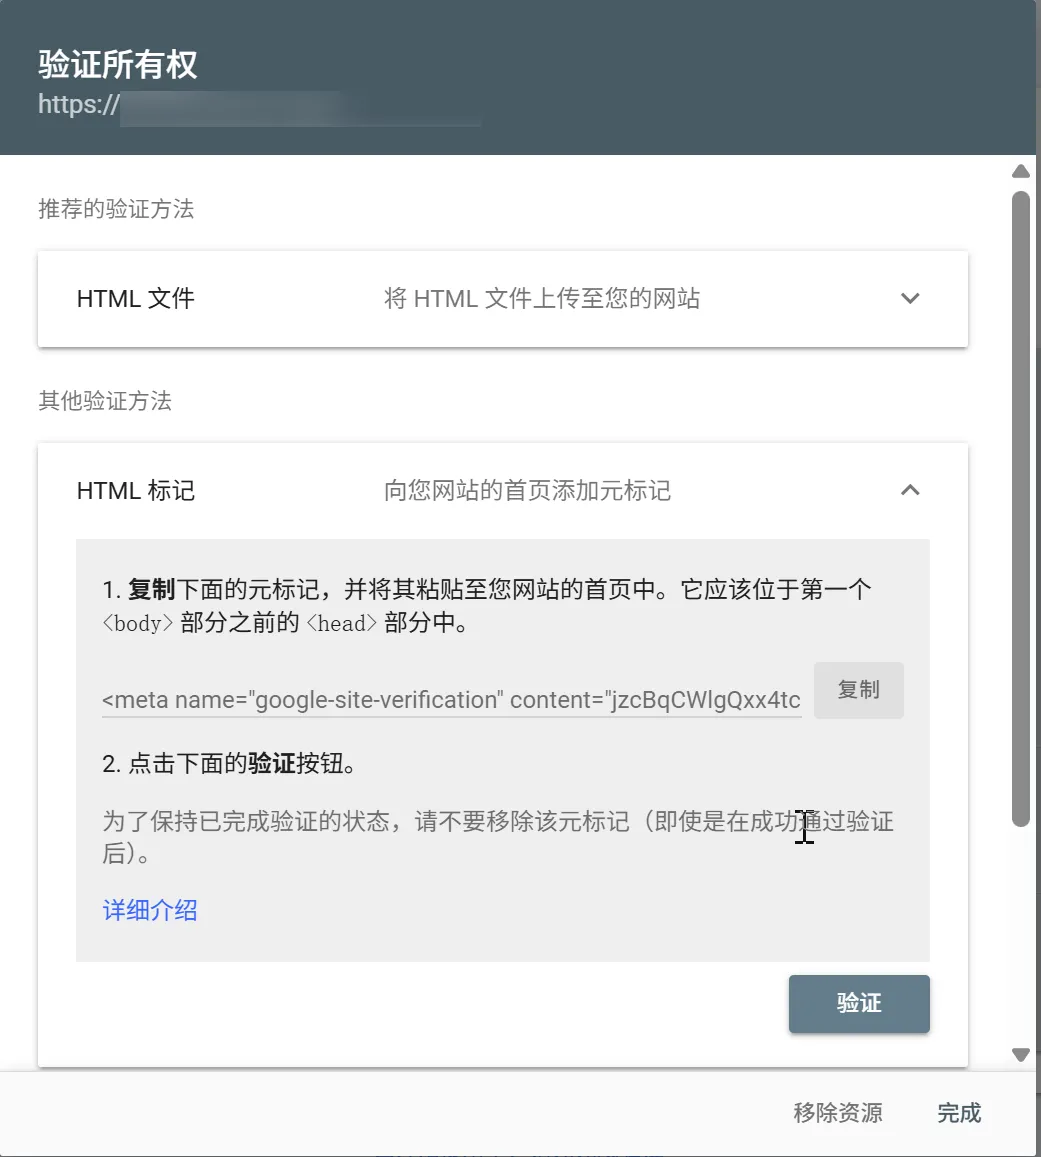
Copy the content value and add it to your environment variables: NEXT_PUBLIC_GOOGLE_SITE_VERIFICATION=xxx.
Then push your code. After deployment, come back and click verify.
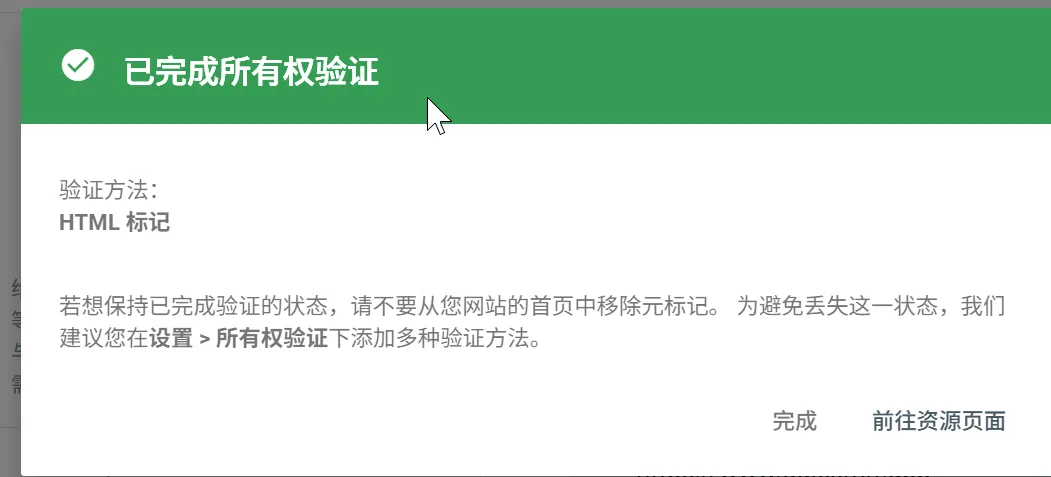
Make sure to click the verify button in the HTML tag row — clicking the wrong one will cause verification to fail.
2. Add Analytics Tracking
Track real user visits and their behavior:
- Which pages get clicked but abandoned within 3 seconds?
- Which pages have longer dwell times and conversion potential?
This data helps you prioritize future SEO optimization efforts.
Go to Google Analytics.
a) First time setting up analytics? Follow these steps.
Create an account and check the following options:
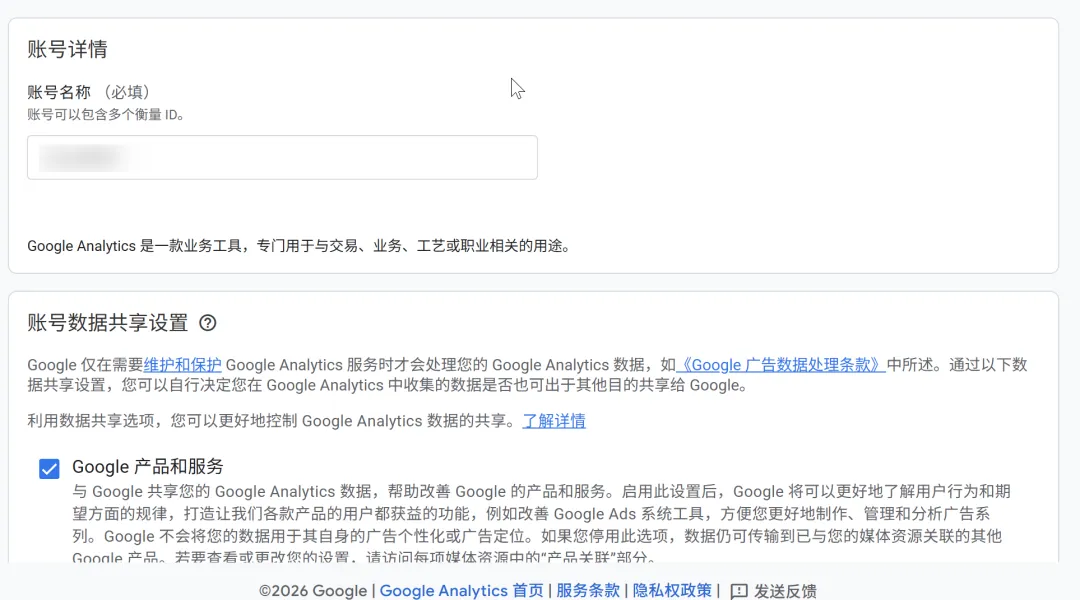
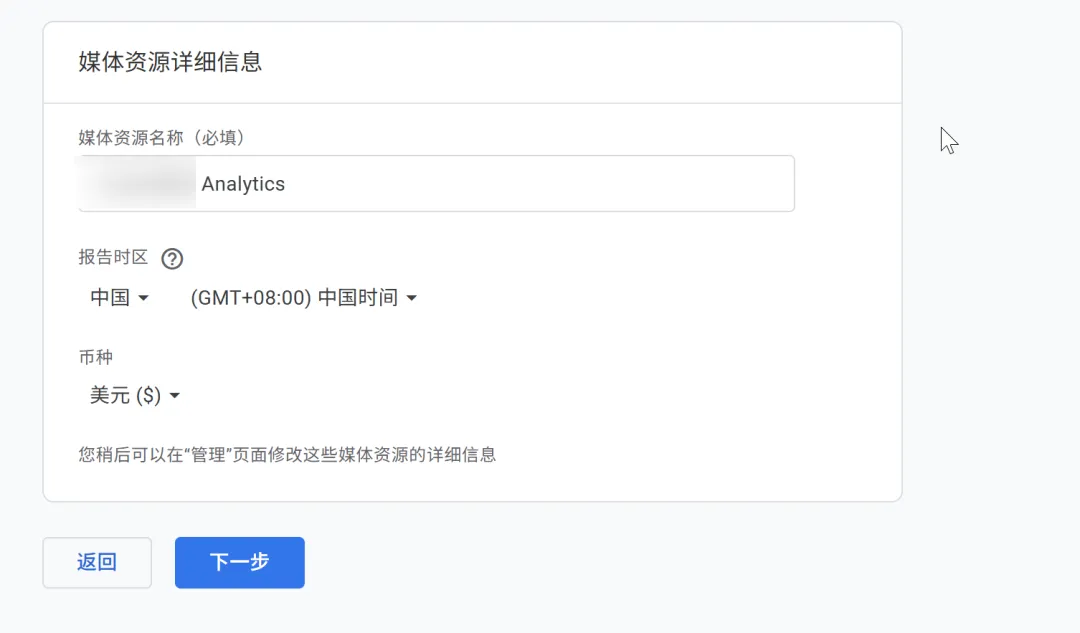
For the first step, enter your domain name. Since the product targets international users, select USD as the currency.
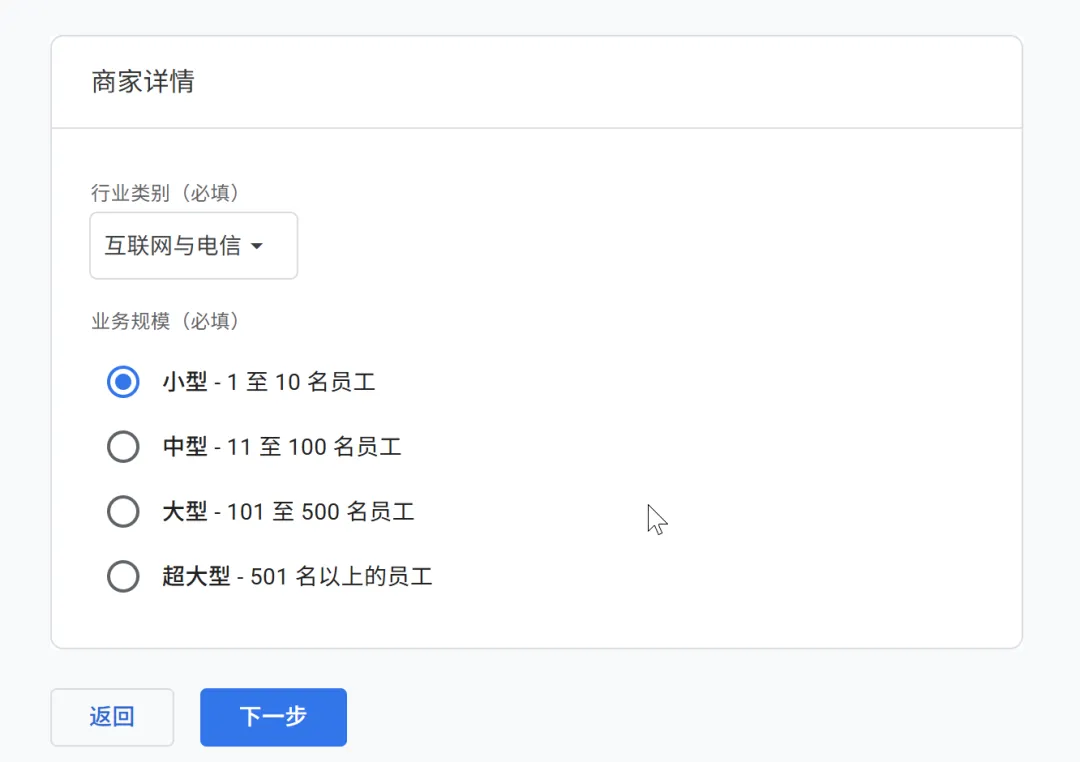
Business details:
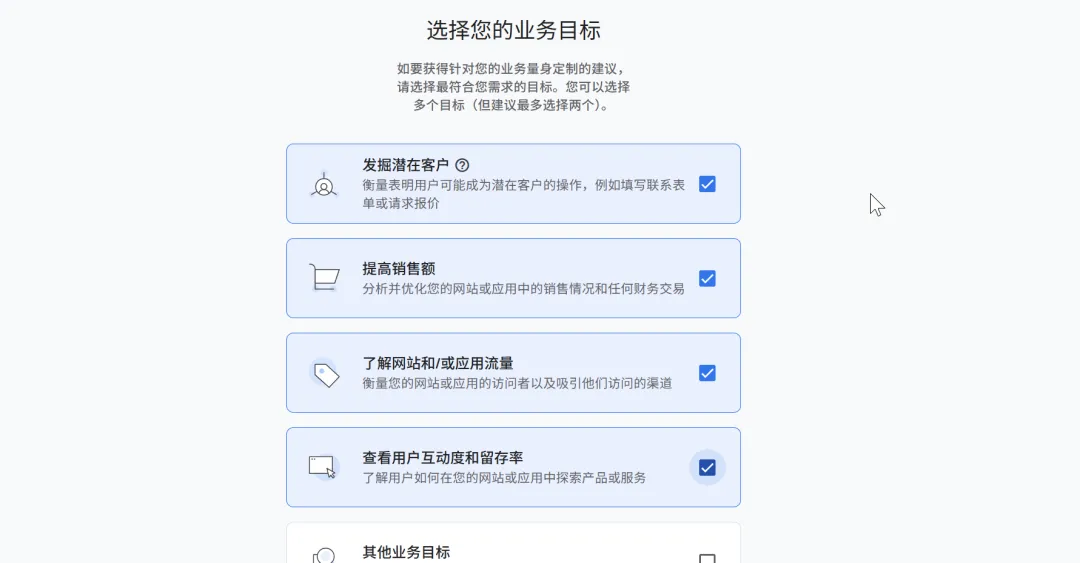
Business objectives — check the first 4:
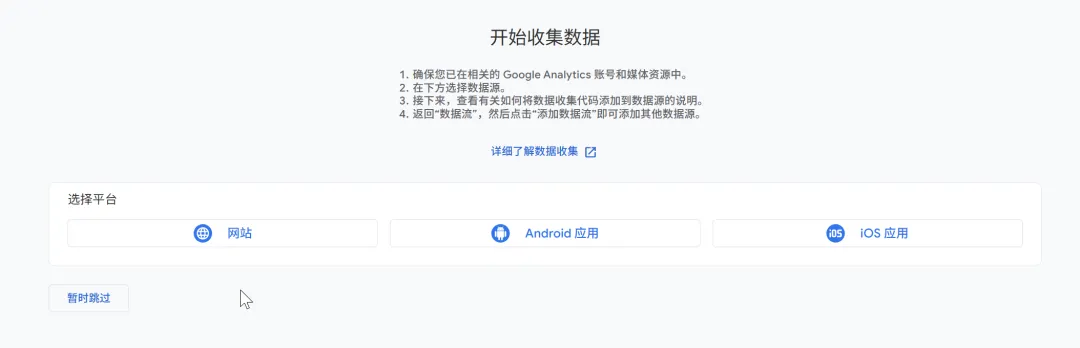
Choose "Web":
For the data stream name, use your domain name + "web" for easy identification:
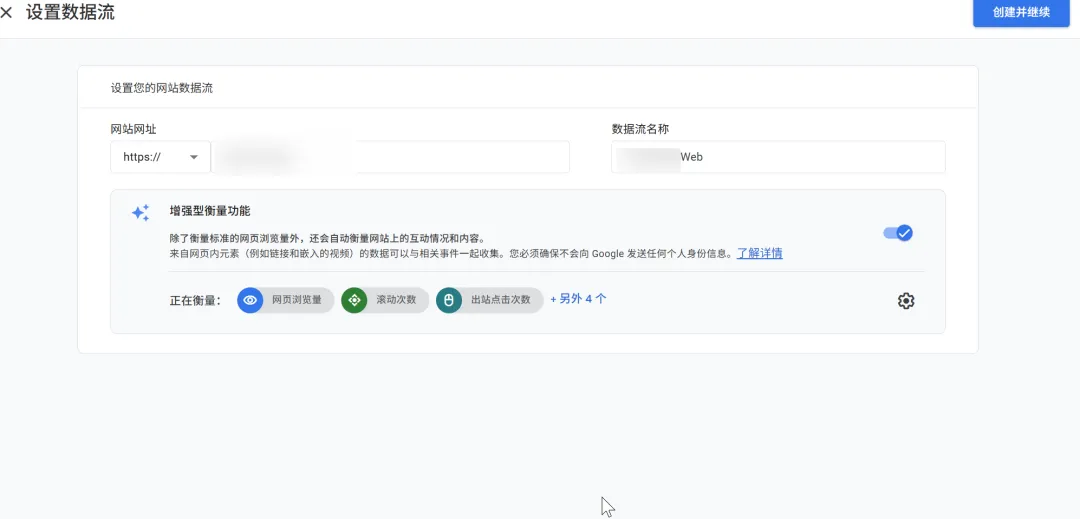
The platform will generate your tracking code:
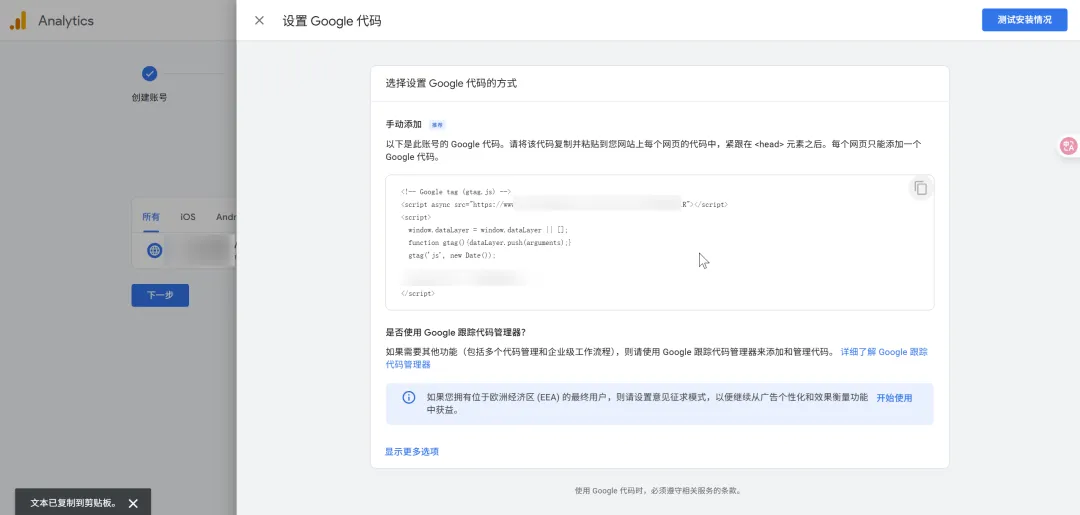
Then update your environment variable: NEXT_PUBLIC_GA_ID=G-xxx.
b) Already have an analytics account? Add a new stream here.
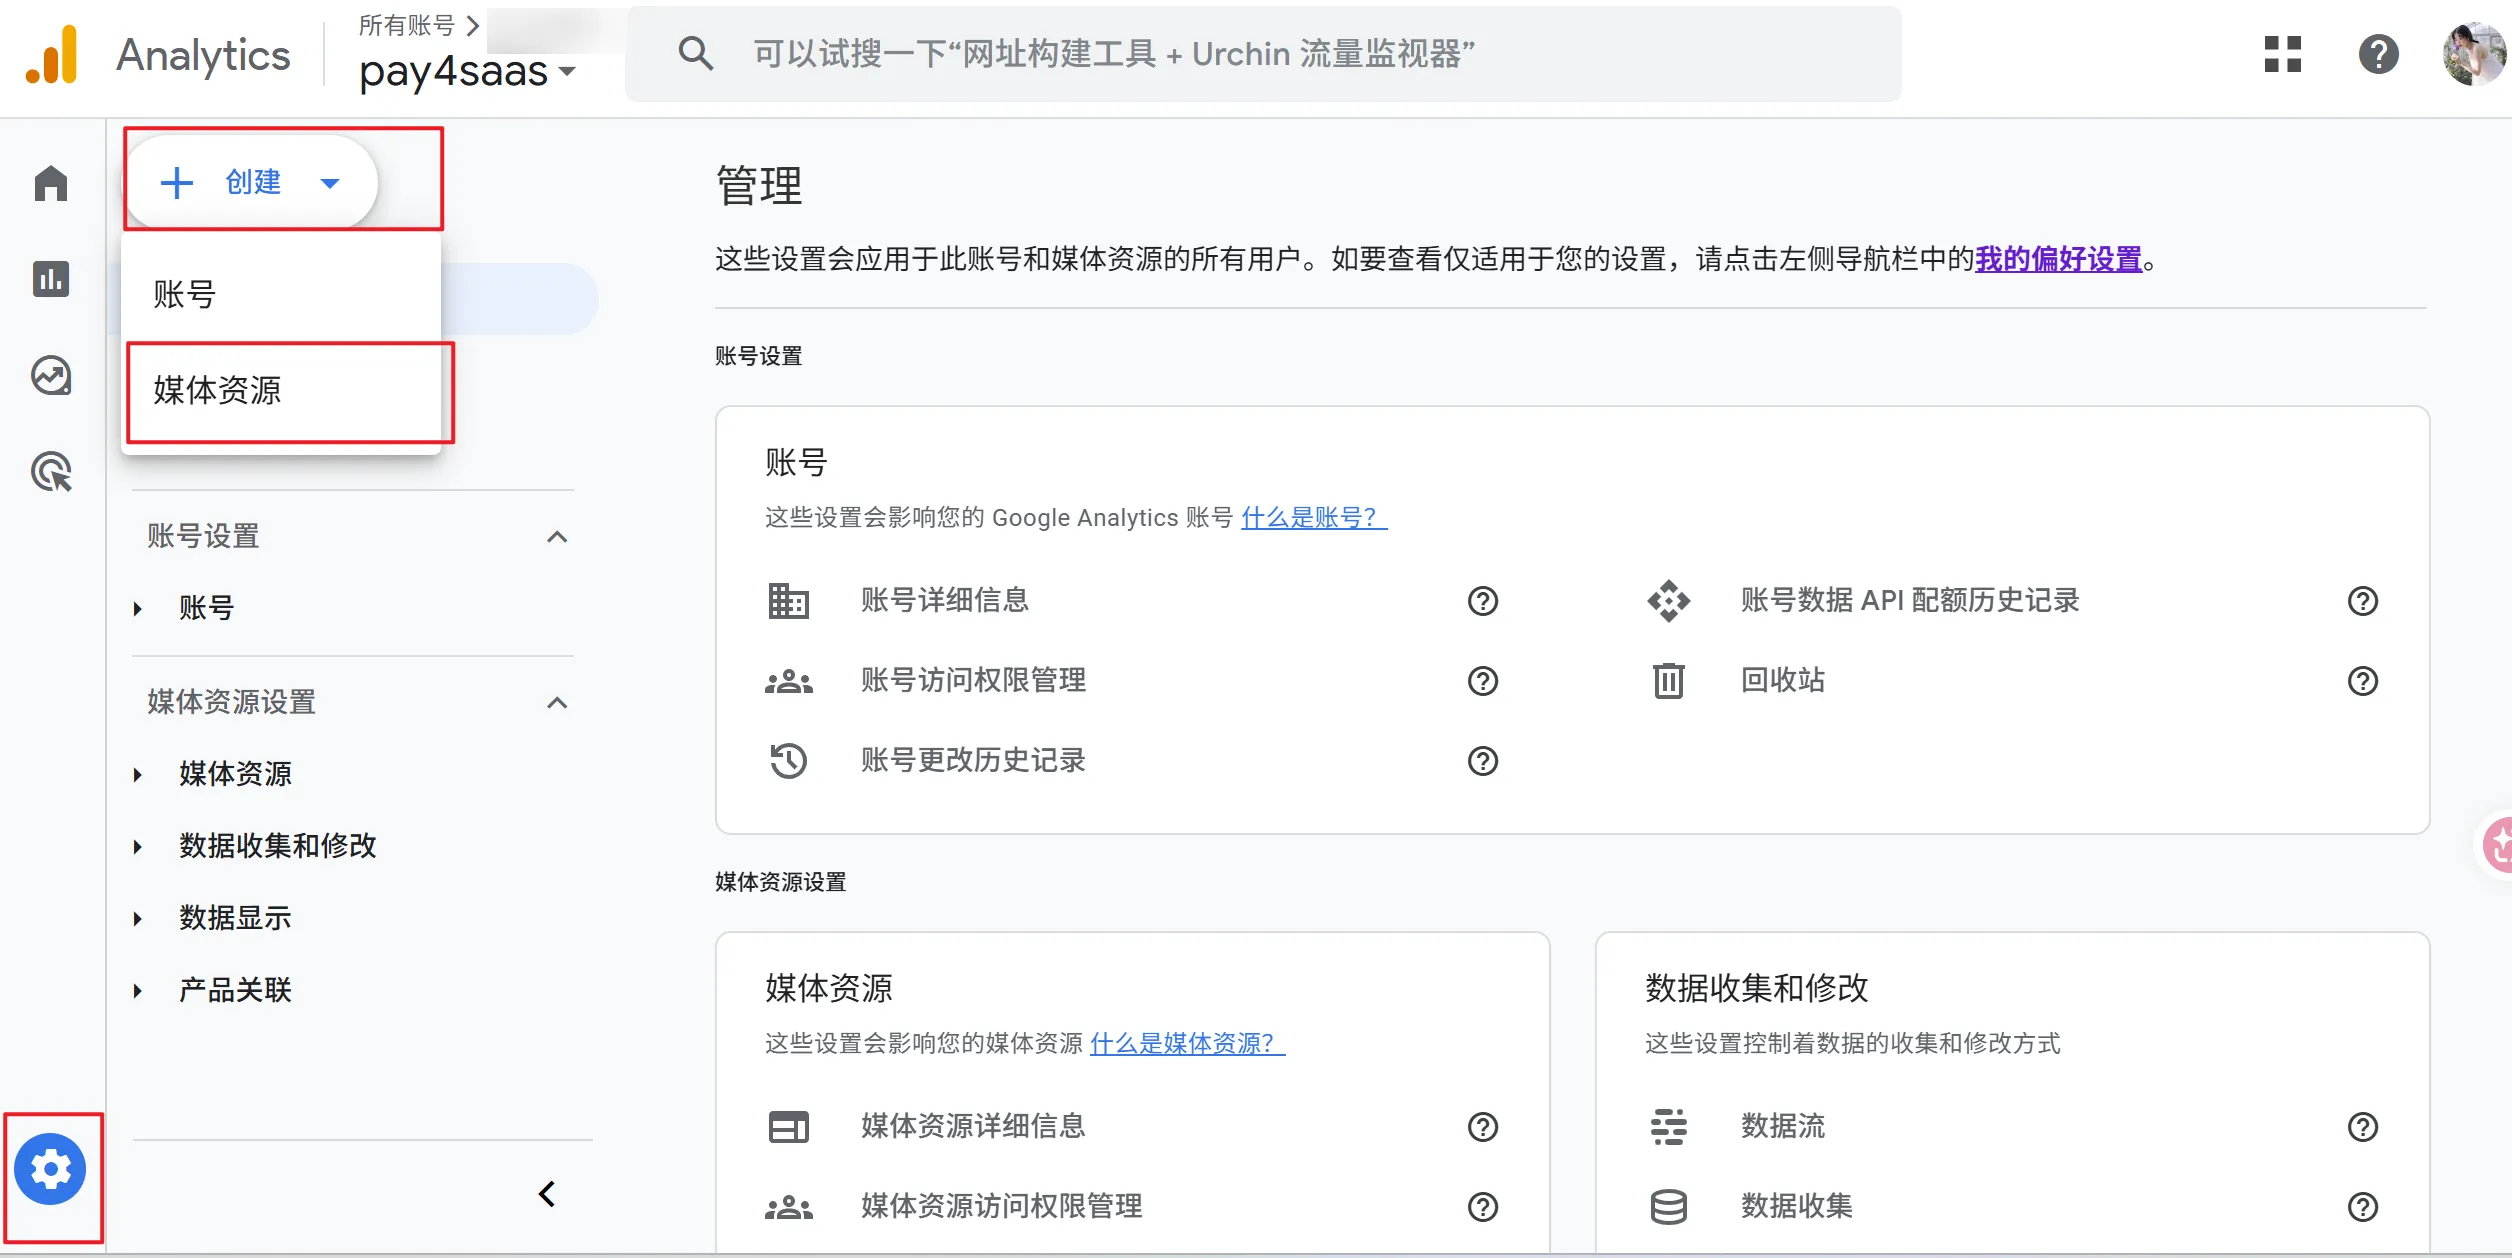
Then update your environment variable: NEXT_PUBLIC_GA_ID=G-xxx.
3. Sitemap & robots.txt
The project includes a fully automated Sitemap and robots.txt — just deploy and it works, no manual configuration needed. See Auto Sitemap & Robots for details.
4. Verify Meta Tags
Ensure your metadata is complete: title, description, keywords, openGraph, twitter, icons, manifest, etc.
5. JSON-LD Structured Data
JSON-LD is a structured data format that helps Google better understand your site. Unlike meta tags (which provide basic page info) and og:site_name (which is for social sharing cards), JSON-LD directly tells Google's search engine what your site is — its name, type, and URL.
Think of it like a business card you hand directly to Google — instead of letting it guess who you are by reading your storefront sign, you explicitly introduce yourself.
The project includes a WebSite JSON-LD on the homepage (app/page.tsx):
<script
  type="application/ld+json"
  dangerouslySetInnerHTML={{
    __html: JSON.stringify({
      '@context': 'https://schema.org',
      '@type': 'WebSite',
      name: 'Pay4SaaS',
      url: 'https://pay4saas.com/',
    }),
  }}
/>
This helps Google display the correct Site Name in search results. Blog pages also include Article JSON-LD for rich results.
You can verify your structured data at Google Rich Results Test.
03
After pushing your code, first confirm that sitemap.xml and robots.txt are accessible, then view page source to verify meta tags.
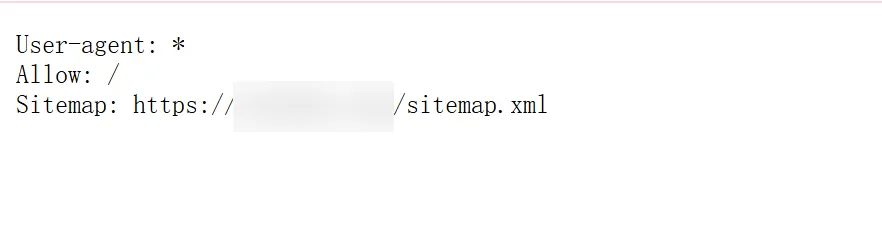
Then open Google Search Console, go to Indexing → Sitemaps, and submit your sitemap.xml. This lets Google proactively discover and crawl all your pages, speeding up indexing.
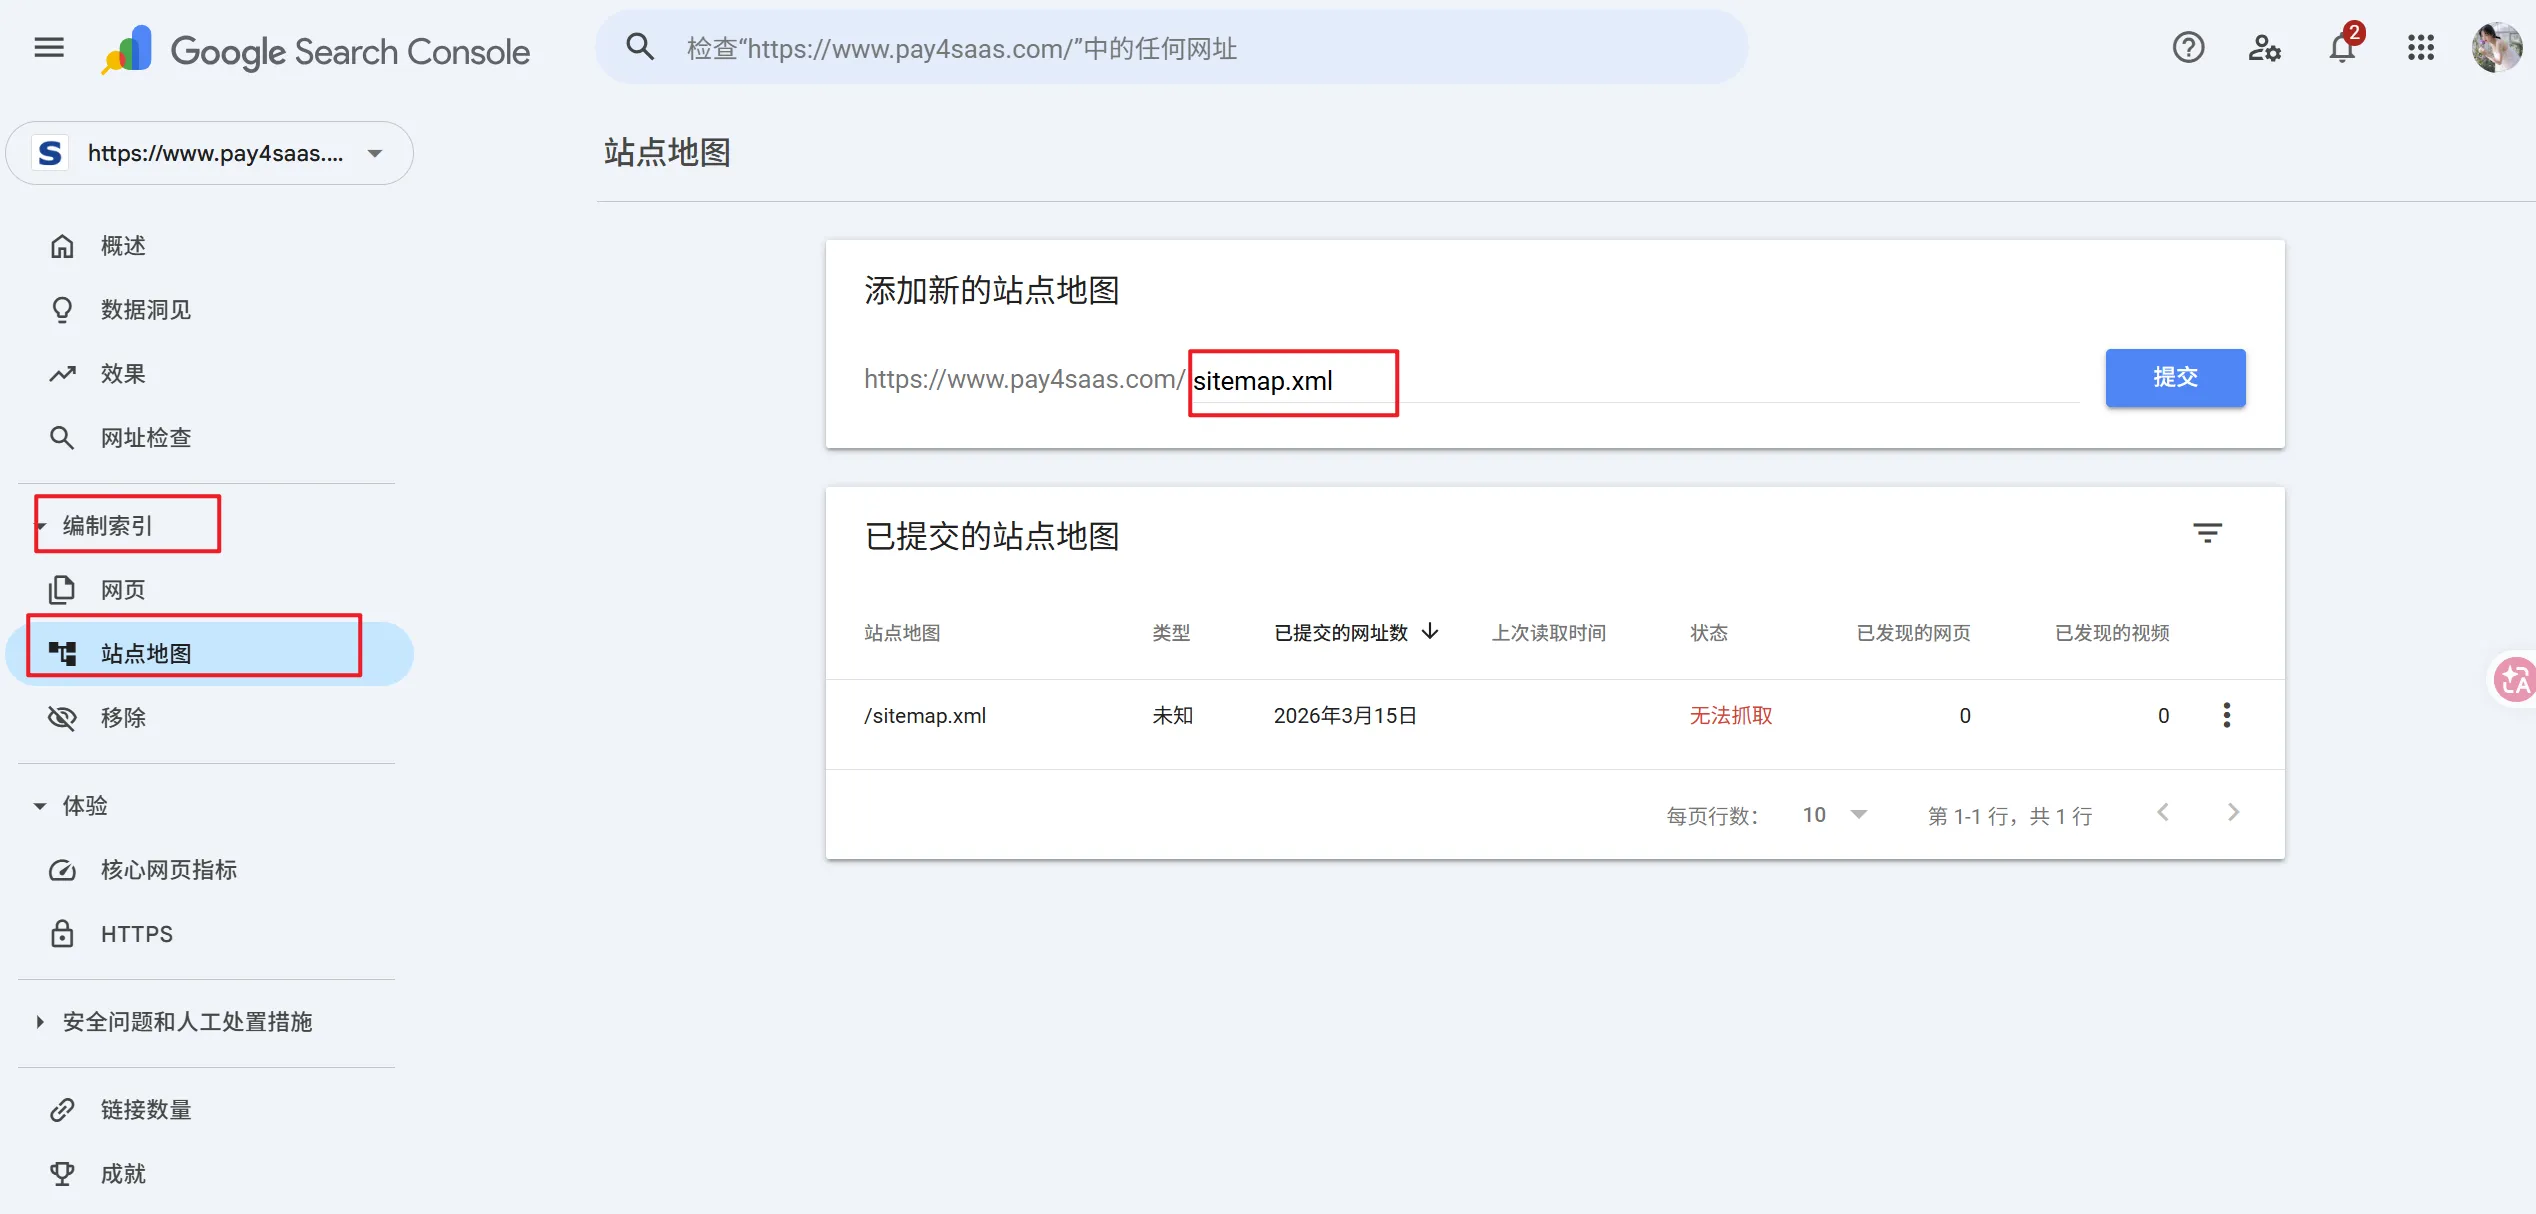
Enter your domain in the top search bar to check indexing status.
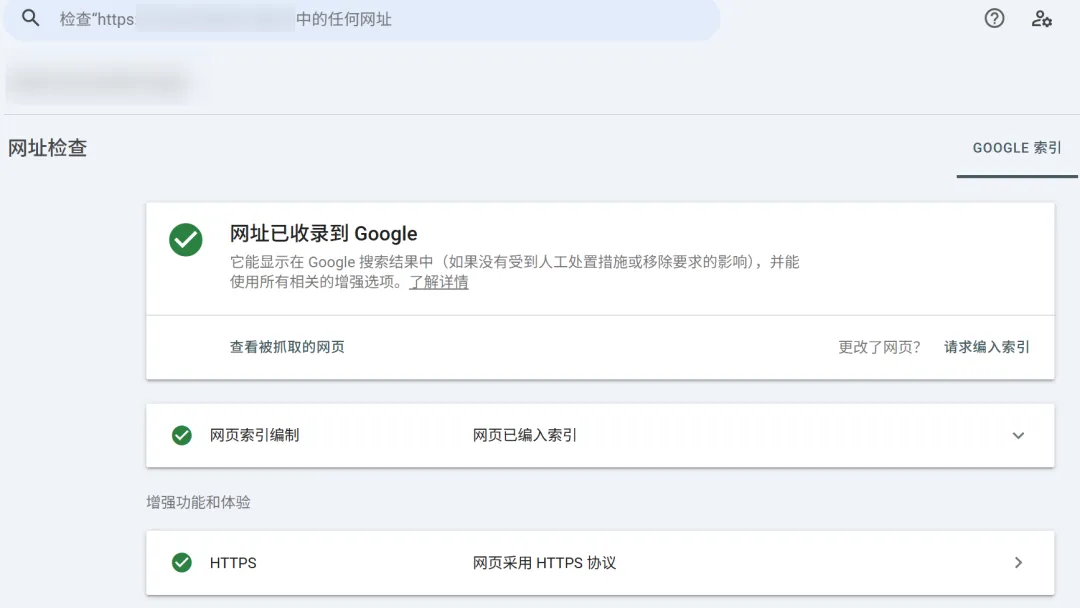
You should see your pages being indexed normally.
Docs home
Return to the full implementation guide.
Pricing
Review subscriptions, credits, and lifetime options.
Blog
Read more notes on SaaS payments and growth.